Showing posts with label glitter. Show all posts

Monday, June 9, 2014

Watercolor Sea Horse Art Lesson

Depending on the age of your students you can provide a stencil or have them draw their own sea horse on watercolor paper.  Once they have the shape cut out of watercolor paper they use drops of different colors to create a light dappled sea horse.

I will demonstrate putting dabs of yellow here and there with a paintbrush, then a yellowish green, then a regular green, then a blueish green and finally some blue.  They will randomly dab the colors on in a pleasing pattern of their own choosing until they feel it is finished.  They don't have to use these colors, but they will be using at least 4 colors that mix well together.  For example - oranges and yellows, blues and greens, pinks and purples etc...

When it is mostly dry they can do a splatter color to add even more pattern/texture to the design.  I use a toothbrush for this.

Finally when the sea horse is dry they can add glitter and sequins wherever they want - but it is an accent, not for covering the whole painting.

It's fun the let students paint with some freedom!

Sunday, November 17, 2013

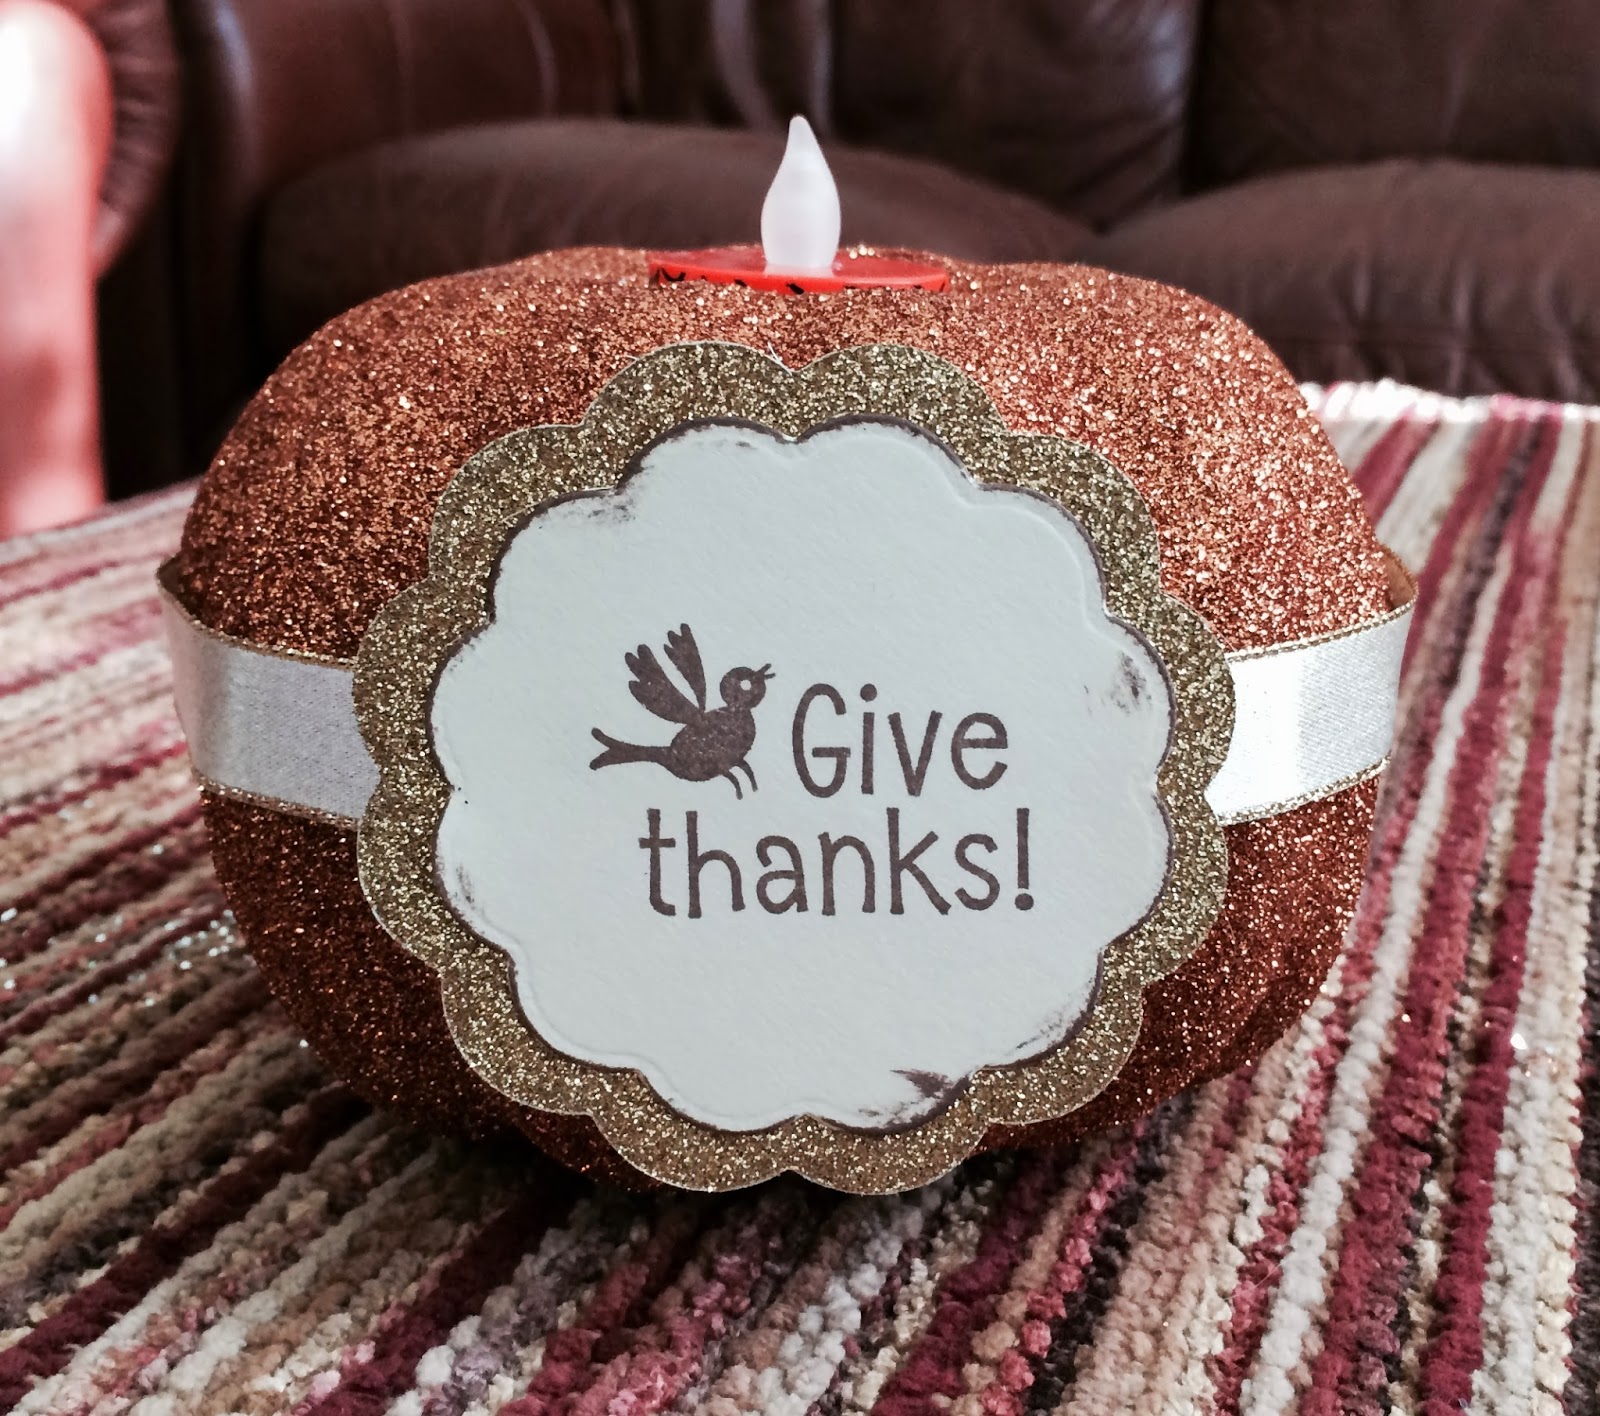
Dollar Tree Pumpkin Thanksgiving or Hanukkah Centerpiece

This year Hanukkah is during Thanksgiving so I am giving my students a choice of creating a traditional pumpkin centerpiece or a silver and blue Hanukkah centerpiece.  
I used Dollar Tree pumpkins and battery operated tea lights.

They are quite simple to make -
I cut the stem of the pumpkin off with scissors and then traced around the tea light where the stem was.
I used a serrated kitchen knife to cut the opening in the top along the line that I traced.
I removed the circle of styrofoam and stuffed a sheet of tissue paper into the pumpkin.
This is to keep the tea light from falling into the pumpkin.  The tea light sits right on top of the tissue paper.
Paint the entire pumpkin with Mod Podge and then pour glitter onto the pumpkin.
While this is drying assemble your label for the front. I used rubber stamps to create the designs.  For the Hanukkah ones I punched a hole in both and tied them together.
Once the pumpkin was dry, I wrapped the ribbon around the back of the pumpkin and hot glued the ribbon in the front of the pumpkin.
Then I hot glued the labels on and finally placed the tea light in the center.

A unique decoration for this Thanksgiving's Celebrations.

Wednesday, July 18, 2012

Dollar Store Beach Treasure Box

I found these wooden boxes at the Dollar Tree in March or April and bought 10 of them thinking I'd figure out something to do with them for one of my art classes.

They are small, about 3 X 3", and have brass hinges on the back.  This week I was inspired to go with an Ocean theme.  I went to www.graphicsfairy.blogspot.com and did a search in their The Sea section.  I found several images and printed up a page with several then I chose the little beach girl for my example.

First I painted the box with Acrylic paint and let it dry.

Then I trimmed the image to size and used Beacon Fast Finish Decoupage to bond the image to the painted box.  I brushed one coat on the box, placed the image in the center and then put a quick coat over both the box and the image.  I painted the first coat of fast finish quickly so the printer ink wouldn't smear.  After that was completely dry I added another coat of Fast Finish over the entire top of the box.

The next step was to hot glue a couple of shells to the box.

Then I used Mod Podge and painted a thin layer around the edge of the image and to the edge of the lid of the box.  I also painted the sea shells.

Then I used Extra Fine Glitter in "Glitz" and quickly covered all the areas I had coated with Mod Podge, and then tapped the box onto a paper plate to collect the extra glitter.  The extra glitter can be re-used.

After that was dry I put a few stick on rhinestones on for one last bit of sparkle.

The bottom half of the box can also be decorated, but I felt that was enough steps for my class at the retirement center.

Now you have a special place for all those beach combing treasures.

Give it a try!  Fun for a birthday party activity - print out any theme images and use paint colors to match.

Up Cycled Egg Carton Animal Portraits

  I have been seeing these on the internet and decided to try making them with my Summer Camp. They remind me of victorian style portraits w...