Tuesday, June 30, 2015

Aboriginal Dot Art Lesson


I'm going to have my students learn about art from other cultures and I've always loved the Aboriginal Dot Paintings from Australia and New Zealand.

Aboriginal Dot paintings didn't exist until 1970 when Geoffrey Bardon became an art teacher with the people in Papunya, Australia. He encouraged the Aboriginal People to record their drawings with paint on canvas instead of in the soil.

Since the Aboriginal People didn't have a written language they used drawings to tell their stories and history. During ceremonies Aboriginal people would clear and smooth over the soil to then apply sacred designs which belonged to that particular ceremony. These designs were outlined with dancing circles and often surrounded with dots.

In the early years of Papunya (dot) paintings still showed clear depictions of artifacts, sand paintings and decorated ritual objects. But this style disappeared within a few years.

Uninitiated people never got to see these sacred designs since the soil would be smoothed over again and painted bodies would be washed. This was not possible with paintings. Consequently Aboriginal artists abstracted the sacred designs to disguise the meanings associated with them. Thus lines were painted with dots.

The works feature a symbolic language of U shapes, concentric circles, journey lines and bird and animal tracks. Artists used a limited number of motifs to express many meanings. A concentric circle, for example, may indicate a camp, a waterhole or corroboree place (A corroboree is an event where Australian Aborigines interact with the Dreamtime through dance, music and costume. "Their bodies painted in different ways, and they wore various adornments, which were not used every day."). It may also represent all or part of a person, the stem of a tree, the centre of a food plant ancestor or a natural feature such as a hill.

I am going to encourage my students to use some of the same designs in their paintings that the Aboriginal People used and an animal native to Australia such as: Kangaroo, lizard, turtle, koala bear, snake, platypus, etc...


The early paintings used mostly earth tones native to the desert landscape, but as time has gone on brighter colors are being used.

Materials needed:

Black or brown paper
bamboo skewers
Acrylic paint
Pencils


Begin by drawing your main animal shape on the paper.
Outline this with the skinny side of the skewer dipped in white paint.  You'll probably have to dip about every 2 dots.  The skinny side will allow you to get more detail in your design, then you can fill in with larger dots.
In my design I included concentric circles and a "Journey Line" as well as decorative designs.
Next add some shapes such as arches, spirals, circles, wavy lines etc....

Now you just add more and more dots around and inside your animal.

Continue filling in with more dots and add more shapes until it feels balanced and finished.


Use both the fat and skinny side of the skewer to get contrast.

There is a meditative quality to creating these - where the students are just responding to their design with pattern and color.  It's a lot of fun and students can easily achieve wonderful results.

Student Artwork:


Friday, June 5, 2015

Glow in The Dark Firefly Art Lesson


Fireflies are such fun bugs!  
I had never seen them until we moved to the East Coast and it really is magical to see them flying in the night sky.

I bought some Glow in The Dark Paint and I've been wanting to try this for a Summer project.

Here is what it looks like in the dark...

I painted some of the dots and the bodies of the fireflies with glow in the dark paint.  After you "charge" up the paint under a light it glows softly.

You will need:
Watercolor paint
pencils
Sharpies - black and silver
Bamboo Skewers - (for the dots)
White Acrylic paint
Glow in the Dark Paint - I got mine at Target


Start by drawing the jar with the fireflies in it.

Pretty simple so any age can do it.
I painted the lid first with some purple, red and blue watercolor paint mixed together.  
This is a great lesson for watercolor techniques.
I surrounded each firefly with a circle of just water and then painted the jar blue around them.
I added some black shading - especially under the lid, at the bottom and sides.

Now let this dry a little so the blue won't totally bleed into the yellow.

When the blue is just damp add a yellow wash over the fireflies and over the blue around them.
I wanted the colors to bleed (wet into wet) together around the firefly to get the effect of the firefly being really bright and then fading outward.

This photo also shows the sharpie on the head and body of the firefly after the yellow dries.
Add some orange to the body of the firefly.
I outlined the wings in metallic silver Sharpie and used a bamboo skewer dipped in paint to make the dots.  The bigger dots are the fat end and the tiny ones are the pointy end.  

I did white paint and silver glitter paint first.  Then I went over the white dots with the glow in the dark paint.  The glow in the dark paint is pretty transparent so you need to do the white first.  

I also painted the bodies of the fireflies with glow paint.  Do at least 2 coats, the more the better for the best glow.

I think my students will enjoy looking at these before they go to sleep.


Sunday, April 12, 2015

Recyclebot - Tin Can Robot Tutorial

I wasn't going to do a tutorial for the tin can robot because there are several examples on Pinterest, but after 5 trips to the hardware store and much trial and error I thought maybe someone would like to see a simple way to create their own.  Here's my version:

 You'll need 5 cans - these are the sizes of the ones I used:
Head - 28 oz.
Body - 108 oz.
Arms and Legs - 15 oz. 
If you don't use these you'll have to change the length of the threaded rods.

The hardware I used was mostly 1/4 inch.  
You'll need 2 12 inch 1/4" threaded rods.  
One needs to be cut with a hacksaw to a 7" length for the legs and a 5" length to attach the head to the body.  
The second one is used uncut for the arms.
Wing nuts are attached to the ends to hold the robot together.
Start by punching holes in the cans with an awl, then drill them with a 1/4 drill bit.
Drill holes for the face and also in the top of the head.
The body has one hole in the top, one on each side at the top for the arms, one on each side for the legs and 3 in the center for buttons.
Each arm can has a hole on each side at the top.
Each leg can has a hole on each side at the top.
This photo shows the inside of the body before I attached the legs.  
The wing nut at the top is attached to the 5" rod going to the head.  
The rod across the top is going to each arm, and the 3 nuts and bolts are the buttons.
 Use whatever you want to make the face.
You can add a wire hangar if you want to hang him somewhere in your yard.
Just add a funnel and you have a Tin Man - when I find some red metal to recycle I'll add a heart!
Spray a clear acrylic finish to seal your robot so it won't rust.


Monday, March 30, 2015

Cute As A Button Bracelet

This is a simple but adorable bracelet that's easy to make!

You'll need:
2 11" lengths of cotton cord
One button with 4 holes about 3/4 inch wide
One button with 2 holes about 1/4 inch wide

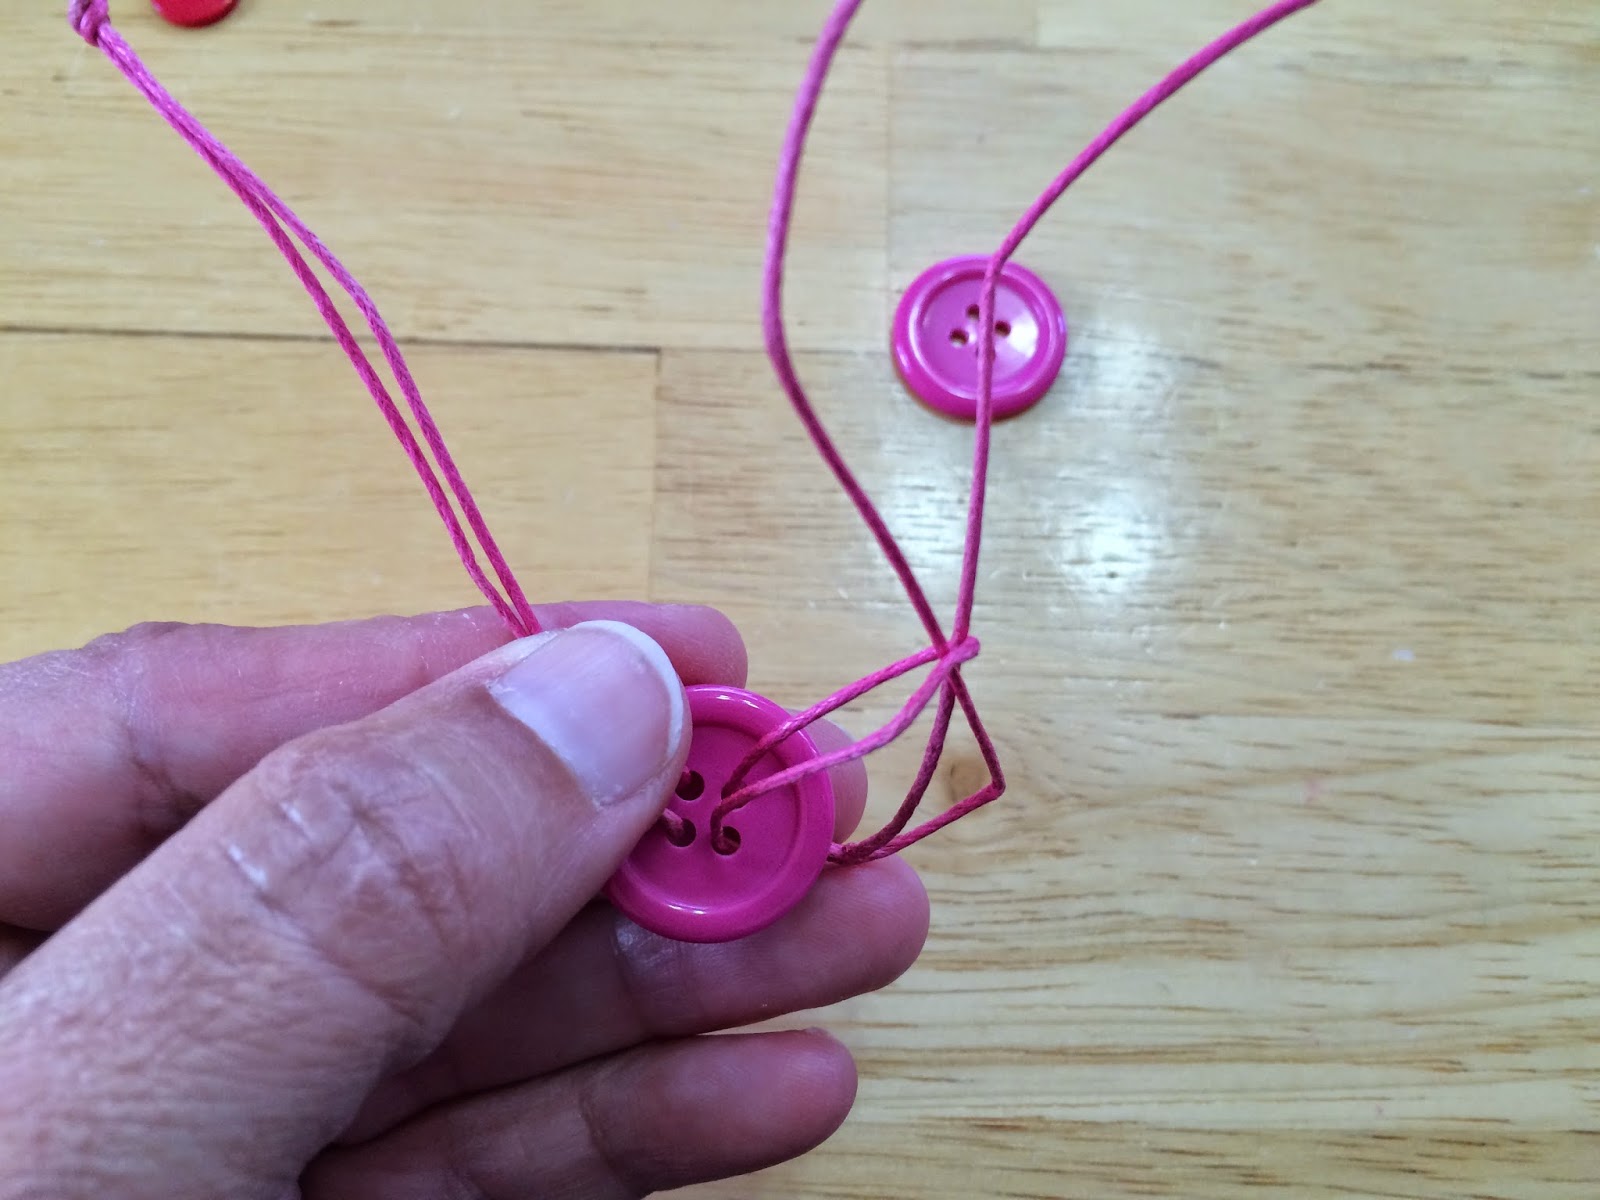
Start with one length of cord and the large button and thread the two ends of the cord into 2 of the holes.
Push the loop in the button up and thread the two ends through the loop.


Pull it tight so it looks like this.

Tie a knot about an 1 1/2 inch from the end.


Then tie another one about a half inch from the first knot.

This will make the opening for the button closure.

Repeat the first step to make the other side of the bracelet.


Thread the smaller button onto the two ends and tie knots in each end of the cord.
To shorten the length of the bracelet just move the button up the cords and tie knots again.

This button slides into the buttonhole on the other side to hold the bracelet together.

Have fun trying different color combinations!


Monday, March 2, 2015

Andy Worhol Pop Art Printmaking Lesson


This is a fun and simple printmaking project, focusing on Pop Art.  I am going to have my students replicate Andy Worhol's style of repeating a popular image on different colors of paper.  

My students are doing a unit on Marketplace so we'll focus on items that can be bought in the marketplace.  I'll bring some groceries etc...  in for the students to look at and we'll discuss Pop Art and Andy Worhol.

They can do soup cans, but I'm going to ask them to think of something they like and see if they can turn it into a Worhol style print, hopefully getting a variety of items.

The students will use foam from a disposable foam plate and water based block printing ink to create their print.

They draw into the foam to create the design, then cut the shape out before printing.
They'll print the image 4 times on 4 different colors of paper, but use the same color of ink for all 4 prints.

They can simplify their design, just suggesting what the product is without every detail.

One of the challenges is to get the words to print correctly and not backwards.  They don't have to use words, but if they do they have to write the words backwards on the foam.

I'm going to show them this example of the word Moo - even though the letters M, O, O are the same whether backwards or not, the word still has to be written from right to left instead of the traditional left to right.


It's confusing, and depending on your age group you may want to tell them no words...

I'm going to let my students choose their own colors of paper, have them do the printing and when they are dry glue them onto a backing paper so they can be displayed together.

What a fun way to teach them about Andy Worhol and his medium, printmaking.  I see his influence on popular culture all the time, they will hopefully start to recognize it too.
Printmaking is always so much fun for the students, it's kind of magical to see that image when they lift away the foam block.  I think they'll love to choose an item from their lives to focus on!

2nd Grade Examples:


Up Cycled Egg Carton Animal Portraits

  I have been seeing these on the internet and decided to try making them with my Summer Camp. They remind me of victorian style portraits w...