Sunday, February 9, 2014

Painted Pachyderms

I am going to do a Wild Animal Theme for my March lessons and I think the painted elephants in India are wonderful.  
 I have a card from India with an elephant made out of recycled paper that I used for my inspiration.
The silver circle in the middle of his forehead is a brad so the head and ears move.
I'm going to show the students photos of the elephants that are painted for celebrations and festivals in India.
 The students can choose any color for their elephant.  
They'll trace the shapes onto card stock and then using a brad connect the ears and head to the body.
They can draw their designs with pencil and then outline them with metallic markers.
Colored pencils will be used to 'paint' their elephants.
After coloring the elephant they can choose some ribbon to put bracelets around the feet of the elephant and some yarn for the tail.
Here is the pattern for the elephant:

A fun and educational mixed media project!


String Art Hearts


I've been seeing String Art popping up everywhere and decided to try doing an art project with the kids using a heart shape for February.  

I went to a home improvement store and they had long 1" X 4" pine boards.  I asked a very nice employee to cut my board into 4" lengths.

Next I created a heart pattern and put dots about every 1/4" for the nails.  Here is the pattern:
Cut out a heart and tack it to the center of the wood square with a nail.  Then go around the heart with the nails.   Hammer the nails into the wood carefully, leaving about 1/2" above the board to wind the string around.

Now the board is ready for the kids to paint whatever acrylic color they choose.
Once dry they will choose a coordinating skein of embroidery floss.

First tie one end of the floss to a nail and then wind the string around each nail towards the outside all the way around to create a border.

Now they can choose how to criss cross back and forth across the heart to create an interesting pattern.  
They may choose to randomly wind the string across, or do a layered pattern on the diagonal.  
This is up to them.  
When they are finished simply tie the end of the string in a knot around another nail.
A fun project that will look great on the wall or on a shelf!


Friday, January 17, 2014

Luv Birds Art Project


These "Luv Birds" are made out of 3 - 4" gourds.  I've had these gourds for about a year and have been trying to decide what to make with them.  I came up with the bird design because they look like a bird shape to me, with the stem of the gourd as the beak.  They are kind of silly and fun - perfect for a kids art project.

I painted the entire gourd except for the stem with pearlized paint - but any acrylic paint would work. 

I used Crayola Model Magic orange air dry clay for the feet - just shape two small rounded triangles and put them right next to each other.  Press the gourd onto them sideways so that they will stand up on their own.  Usually the clay will just stick to the gourd, but you can also glue them on.

Clip the stem with scissors to the desired length and paint the beak.

Once the gourd is dry trace or draw a heart shape onto each side of the gourd for wings.  I used a fine point brush for the heart outline, then I used a toothpick dipped into paint to create all the dots which create patterns/flowers on and around the 'heart wings'.  Just have fun and play with different colors.  Go slow and allow the designs to dry before moving on to another color or the other wing.

I used a sharpie to create the eyes and then contrasting feathers were glued on for the tails.

Wouldn't they make a fun valentine for someone special?  They make me smile!

Thursday, January 16, 2014

No Sew Sock Owls

I have always loved owls - but lately so does everyone else!  They are everywhere!  
This is a fun project I came up with for several of my art classes...

I found a multi pack of bright socks at Target - you could use earth tones but I chose to go with totally unrealistic colors.  You cut the heel off of the socks...


Here are the shapes to cut out of felt that will coordinate with the socks...
Template at the bottom of the post.


Cut the feet on a fold and you can add buttons for the center of the eye.  I glued the wings at the top.

Now put some beans or rice in the bottom of the sock to create a base for the owl to stand up on his own.  Then add fiberfill until the owl is rounded and plump - leaving about an inch at the top unstuffed.

Using fabric tack or hot glue fasten the eyes and beak onto the sock about an inch below the top.  Now fold the 2 top corner edges under just a little and put a drop of glue to hold them together for the ear tufts.

Next pull the back top edge of the sock over the front and glue it over the very top of the eyes.
To finish glue the ear tufts further across the top and you may want to put some fray stop on the exposed sock edges.  Glue the wings and the feet onto the owl and you're done!
What a Hoot!
PDF of the Patterns:


Wednesday, December 18, 2013

2014 Year of the Horse Chinese Brushpainting Project

Chinese New Year is always a fun topic for an art lesson, and this year is the year of the horse.
I came up with a simple but elegant project for the kids in my art class.

First start with scratch paper and do some sketches - the basic shape of the horse starts with an S shape.  Add the mane and tail, then the ears.  Now demonstrate the top of the horses head, practicing the curve of the forehead and the indent of the nose.  Next practice the jawline, another curve and indent, but the opposite direction this time.  Finally add the eye.

Have them also sketch the Chinese Character for Horse.

Give them their watercolor paper and have them sketch the horse and the Chinese character for horse.
Give the students a fine tipped brush and the black watercolor paint to go over their sketch.
The same for the red watercolor paint to do the Chinese character.

Now for the hangar - I found some fancy chopsticks and simply punched large holes with a hole punch, threaded the chopstick through the paper and added some red string tied in a loop.  Thread the string under the chopstick and you're finished.

Gung Hay Fat Choy!
Here's a new one for the Year of the Dog!

Sunday, November 17, 2013

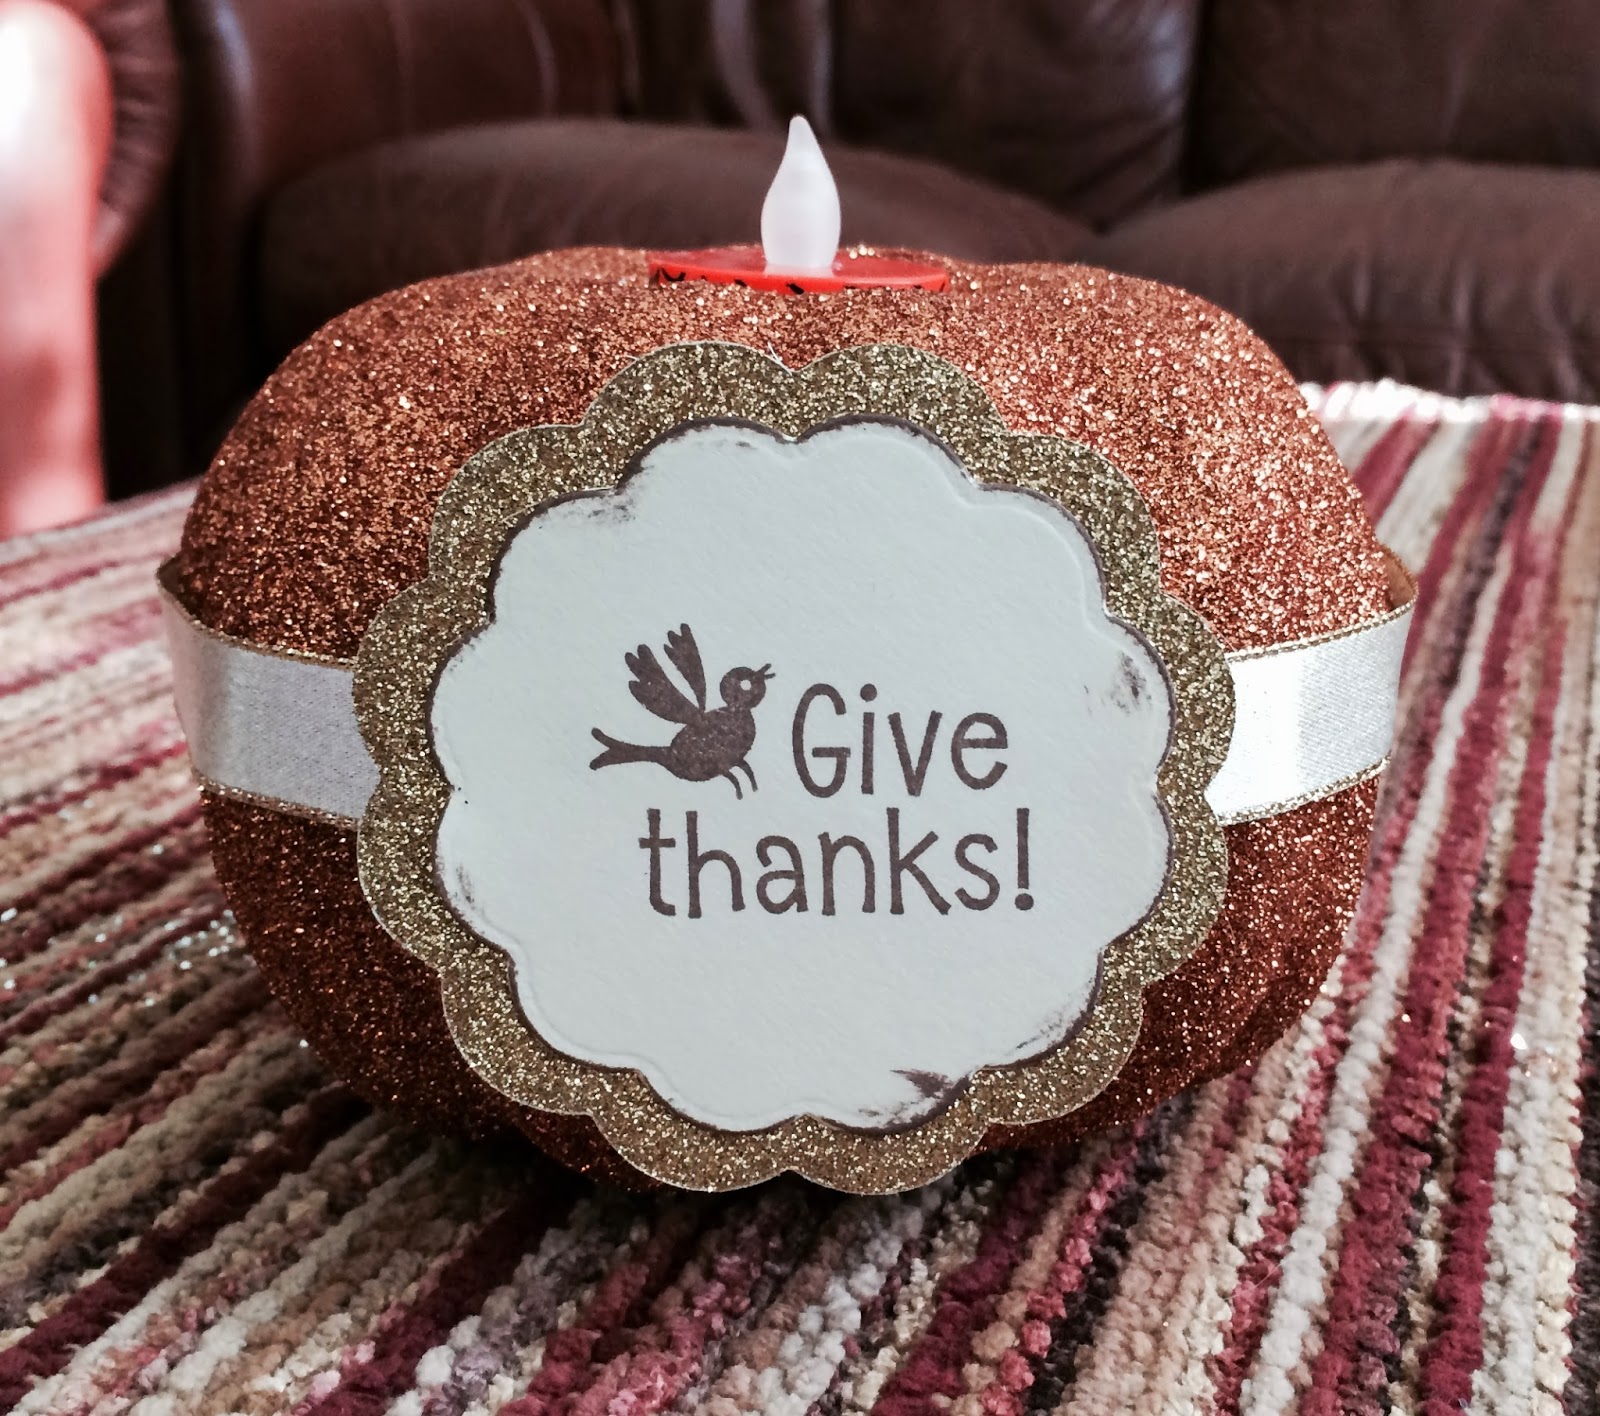
Dollar Tree Pumpkin Thanksgiving or Hanukkah Centerpiece

This year Hanukkah is during Thanksgiving so I am giving my students a choice of creating a traditional pumpkin centerpiece or a silver and blue Hanukkah centerpiece.  
I used Dollar Tree pumpkins and battery operated tea lights.

They are quite simple to make -
I cut the stem of the pumpkin off with scissors and then traced around the tea light where the stem was.
I used a serrated kitchen knife to cut the opening in the top along the line that I traced.
I removed the circle of styrofoam and stuffed a sheet of tissue paper into the pumpkin.
This is to keep the tea light from falling into the pumpkin.  The tea light sits right on top of the tissue paper.
Paint the entire pumpkin with Mod Podge and then pour glitter onto the pumpkin.
While this is drying assemble your label for the front. I used rubber stamps to create the designs.  For the Hanukkah ones I punched a hole in both and tied them together.
Once the pumpkin was dry, I wrapped the ribbon around the back of the pumpkin and hot glued the ribbon in the front of the pumpkin.
Then I hot glued the labels on and finally placed the tea light in the center.

A unique decoration for this Thanksgiving's Celebrations.

Monday, November 11, 2013

Holiday Crafting 2013

So I've been busy planning and teaching lessons for November and December and decided to post them here since I actually have a few minutes to do so : )

In November I wanted to do something with squirrels - I came up with a cute acorn squirrel but decided it would be too hard to teach because of the hot glue gun being the primary tool to make it - but it's cute and easy to make...
I cut the feet out of brown felt - they are one piece - and two ears.
I hot glued the two acorns together and then glued a pipe cleaner behind the body in the middle to create the arms.  
I used bumpy chenille for the bushy tail, glued the legs and ears and drew the face with a Sharpie.

Then I came up with a printmaking project with a Squirrel
Using large styrofoam plates I trim off the edges so there is just a flat piece of styrofoam.  
Students use dull pencils to draw their squirrel and leaves etc... onto the foam.
I used a directed drawing to help them with the drawing part and discussed using pattern on the squirrel in a few areas.  A stencil for just the outline of the squirrel might be helpful as well.
The very dark areas are created by taking the pencil and indenting the foam in the shape desired.
Next we inked the plates using a rubber brayer and yellow water based block printing ink.  
I chose brown paper for the background.
They use their hands to press very hard on the back of the foam to create the print.
If they want to they can create more than one print.
This is a fun project because students really like removing the foam and seeing the image they created underneath.

For December I am making Wooden Bead Elves, North Pole SnowGlobes, & Winter Angels
So the wooden bead elves are an idea from Pinterest, but I chose to use colored wooden beads to make him just a little more fun.  
The Snowglobes are also from Pinterest -  My So-Called Crafty Life.
I changed them a little bit too - I like putting a puffy snowbally pom pom at the top for the hanger and wrapping white sparkly pipe cleaners at the top.  
They are made out of plastic wine glass tops ground down with a Dremel tool, see the link for instructions.

I have been intrigued with the cute peg dolls I have been seeing on Pinterest so I decided to try and come up with an angel.
You start with a 2 3/8" Peg Doll and paint the bottom white, seal the head with Mod Podge so the paint doesn't bleed when you do the face.
The coat is a half circle cut out of felt, the hat a triangle, and the wings
 are a heart shape.
Using a hot glue gun I glued the hat into a cone shape and also glued in a length of pipe cleaner so I can shape the hat later.
I glue the coat, the hat and the wings onto the doll.
Then I added the Halo out of some tinsel garland that I found at Wal Mart for mini trees.
I finish with the buttons and bells and draw on the face with oil based paint markers.
I'm just going to have mine stand up as a decoration, but you could add a hanger easily for a Christmas ornament.


Rad Raccoon with Wet into Wet Watercolor in Warm and Cool Colors

  This is a simplified Raccoon Project with either Warm colors on the Raccoon and Cool colors around the Raccoon.  Or Cool colors on the Rac...