A super easy and fun Summer Project
I taught this project to disabled students who struggle with scissors so I made patterns and cut the ice cream and cones out prior to teaching. I think it would be great to have the students draw and cut their own ice cream and cones. You could also get really creative with the colors/flavors - mine are basic chocolate and strawberry.
If you want to use the patterns here are jpeg versions below
How to do Shaving Cream Printmaking or Paper Marbling
You'll need a tray, plastic knife, bamboo skewers, shower squeegee, shaving cream - not gel, and liquid watercolor paint.
Start by spreading some shaving cream onto a tray with a plastic knife.
Add a few drops of the color or colors you want to use.
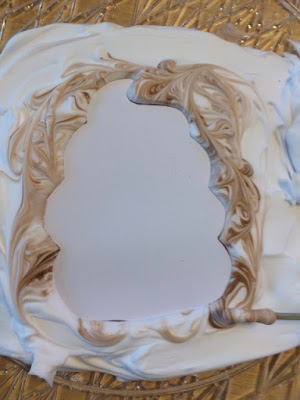
Begin dragging the skewer through the shaving cream and the dots, I like to use a figure 8 pattern and large circles.
When you have a design you like lay the paper over the shaving cream and paint and lightly press down on the paper so that all of the paper touches the paint.
Place the marbled paper on newspaper and squeegee the shaving cream off, leaving the print.
To create another print smooth the shaving cream over with the knife and add more paint.
Students love doing this, it's magical to see how the paint adheres to the paper but the shaving cream is gone. The designs are always striking, yet so simple to create.
I've used this technique for many different projects and it's always fun with easy cleanup and wonderful finished projects!


