Monday, November 9, 2015

Wine Cork Santa Ornament Craft

A fun up cycled project that's very easy for all ages!

You will need:
Corks
Pink, red and black acrylic paint
Toothpicks or bamboo skewers
5 mm. red pom poms
Glitter drape for beards
Felt hats - or felt/paper to make your own hat.

Start by painting the cork with pink 1/3 and red 2/3rds.
Add the two eyes by dipping the end of a skewer or toothpick in black acrylic paint and dotting it onto the dry pink face.

I tried using red and black sharpies and also paint pens, but they kept picking up the paint on the tip and didn't work well at all.  Since I am going to be teaching this to kids I wanted to find a way to create the face that was easy.  The paint on the toothpick works great.

Glue a red pom pom on for the nose.
Cut the beard out of the Glitter Drape, basically a triangle with the top cut down in a curve.
Glue it onto the front of the cork just under the nose.
I bought this at the Dollar Tree and used it folded so it was 2 layers.  I took the glitter off.
You could use cotton wool, but this was really easy to use and very inexpensive.
I found these hats at Hobby Lobby, I had to stretch the bottom a little and then they fit perfectly.

If you want to hang them on the tree glue a thread or wire ornament hanger to the back of the hat.
These would make a cute hostess gift hanging from a bottle of wine!
They're a Jolly Bunch!

Student Santas


Sunday, November 8, 2015

Folk Art Angel Collage Art Lesson


I have always loved Mexican Folk Art Angels.
I'm going to use this as a Christmas lesson with my students this year.
It's an easy subject to simplify for any age.
Students love having a variety of materials to work with and making all the artistic choices to design their finished piece.

You will need:
white paper for the face and arms
scrapbook paper for the dress, background, wings and halo
colored pencils
fine point marker
glue
scissors
embellishments like ribbon, jewels, beads, flowers etc...
scalloped circle paper punch

I am going to have my students draw their own faces, wings and dress.
Once drawn, outline the face etc... with fine point marker.  
They can use colored pencils for the face etc...
If you would like patterns here is a jpeg:
The face is basically an oval with the neck and shoulders below.  The dress is the rest of her body except for the arms at the top of her dress.  There are so many ways to make the wings I thought I would just let the kids do them however they want.

I'm going to let them choose from a variety (foil and glitter are fun) of papers for the dress, wings and halo.
I used a punch for the Halo, but you could also cut out a circle.

Once they assemble the Angel and glue her onto the background they can use all the embellishments to finish her however they like.

A beautiful collage lesson with some drawing thrown in too.


Tuesday, September 29, 2015

My Neighborhood Art Project


A Stamping and Drawing lesson to go with the Mapping Unit in our 1st Grade, however I think this is also a great Fall Lesson for Harvest.

You will need:
Paper
Sponges cut into simple shapes
Tempra or Acrylic Paint
Pencils and Erasers
Sharpies

I bought sponges at the Dollar Store and cut them into shapes of trees, houses, yards and fields.

I folded the 12"X12" paper into thirds and demonstrated stamping with the sponges in 3 rows across and down.  This leaves room for roads and other details they may want to add.

The sponges stay with their color so the paint doesn't get all mixed up.

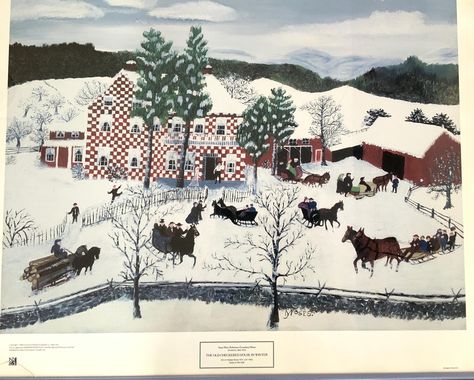
While this dries I'm going to show them some examples of other artist's work similar to this, such as Grandma Moses and Charles Wysocki

If you're in a hurry you can always use a blow drier to dry them faster.

 Grandma Moses, July 4th
Charles Wysocki, Black Birds Roost

Then the students will add all their details to their Neighborhood. 
I'm not going to talk to much about accuracy - it's from their imagination and they can use their "Artistic License"

If they know the names of their streets and their address they can add those too.

I'm going to let them draw until they are happy with their "Maps" or "Neighborhoods", adding whatever details they want to add.


Wonderful 1st Grade Student Work


Monday, August 24, 2015

Wooden Block Halloween Countdown Calendar Craft


I found some wooden alphabet blocks in the 3 dollar section of Target to use as countdown calendar cubes.  

I teach several classes with a very low budget so I thought this might be a less expensive way to teach the project.  

I have seen the unpainted wood for sale at craft stores and it's around $5.00 each.  This is less than $1.00 per student.
You will need:
Wooden blocks
Acrylic paint
Mod Podge
Paintbrushes
 5/8" Circle Paper Punch and paper cutter
Scrapbook Paper
Printable Numbers and Days Til Halloween

Start by painting the block edges - you can paint the whole block, but you don't have to.

While those are drying paint the base - I made the base out of wooden stakes that I bought in a bundle at a home improvement store.  They are 1 1/2" wide and 3/4" high.  I cut them with a Mitre Saw into about 3" strips.

I could get 3 bases out of one stake.

Once these are all painted they can dry while you select your paper backgrounds and punch out the numbers.

I used scrapbook paper in one inch strips, which I then cut into one inch squares with my paper cutter.  
Then I printed my numbers on orange paper and punched the numbers out with the 5/8" circle punch.
There is a jpeg of the numbers and the words at the end of this post

I printed mine on orange card stock (numbers) and scrapbook paper (Words).

Once the blocks are dry mod podge a square of scrapbook paper onto the block, then add the number over the top.

The first block should have 0, 1, 2, 3, 4, 5  The second block should have 6 (inverted also 9), 7, 8, 0, 1, 2

When you are finished with the number blocks, mod podge Days 'Til Halloween onto your painted base.

That's it - All done - and it can be used year after year.

Jpeg Letters and Numbers:


Monday, July 13, 2015

Handmade Paper Wish Bowls and Paper Casting Lesson


My students are going to make their own handmade paper Wish Bowls.  They'll write their wishes on rice paper, roll them up and tie them.  When their wishes come true they can add some new ones.

Handmade paper is one of the most fun, but also messy projects.  
The Process is as much fun as the Product.
Summer is perfect because you can do it outside.

I love the idea that the paper becomes the art instead of the surface for the art.

Handmade paper can be made very economically with just a little bit of prep.

You'll need:
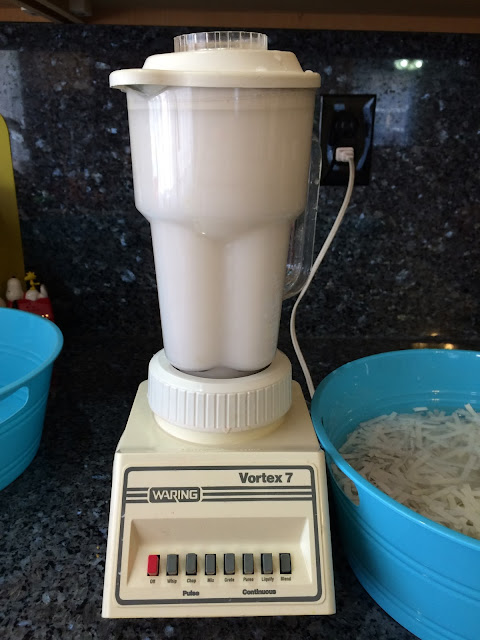
A blender - great thrift store or yard sale item.
Paper - 
I use construction paper, but you can use newspaper, or anything made of paper that you want to recycle.  You can also buy Linter Paper made especially for paper making.  It is very soft when it dries because it's made out of cotton.
Water
Newspaper
Felt
Sponges
Window Screen Moulds
See below for instructions on how to make these out of embroidery hoops.
Various water containers and trays

I use fiberglass window screen - sold by the foot at home improvement stores ($1.29 foot), and wood embroidery hoops.
One foot of screen will make about 3 Moulds.
Simply cut a square of screen larger than the hoop and lay it over the inner hoop, then keeping the outer hoop as small as possible (so the screen stays tight) push it over the screen.  Tighten the screw as tight as it will go and now you're ready to make paper.

You want to make the paper on the top of the screen:

Not on the inside where the rim is:
Soak your torn or shredded paper overnight to soften it.  Otherwise your blender motor might overheat.
This is white construction paper put through the shredder and soaked.
Your paper should be a 1 to 4 ratio to water, or 1/4 paper to 3/4 water.  
You will have lots of water left over - that's the messy part.
I use the lowest setting and pulse a few times then the highest setting until it seems well blended.
The kids love to push the buttons and watch the process.
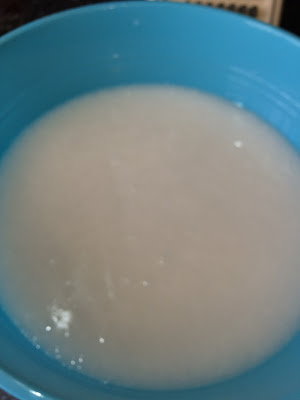
Now that it's blended dump it into a container that the hoop will fit into.  Make several batches and then start making paper.

You can also use colored paper.
Stir the paper pulp with your hand so it's not all settled to the bottom and dip your screen under the pulp.  Pull the screen upward and let the water drain leaving the paper pulp on top of the screen.
This is called "pulling a sheet of paper"
This is the screen draining.  Next you can either use newspaper or felt to press out the excess water.
Newspaper if you're making flat sheets of paper, felt for shaping paper such as the bowls.
Press the newspaper over the top of the screen to get some water out of the pulp, and then turn the screen upside down and lift it off the newspaper.  
This is a sheet of paper that will dry and peel right off the newspaper.
This is felt over the paper, press gently and let the water go onto the newspaper.
Wring out your sponge and wipe it over the felt, wringing it out repeatedly.  When it is more damp than soaked turn the hoop face down with the felt underneath and it should fall off the screen.  If not try getting it started by gently pulling an edge.
This is the paper on the felt.
Now you're going to try and center the paper over the bowl and gently lift away the felt, laying the paper over the bowl.
Try and use a very smooth bowl.
Gently shape the paper to the bowl, making folds if you need to.
You could leave it plain, but I'm going to add these threads crisscrossing the bowl and then another sheet of paper over the top of them.
I'll add some glitter to the paper pulp too:
Here it is ready to dry - If you leave it outside in the sun it could dry in only a day.

I sprayed the inside with glitter spray, and added some wishes written on rice paper, rolled up and tied.
I also put in a few sequins and gems just for fun.
When your wishes come true put some new ones in : )
Student work:

One layer of white with pink over the top.

From the side...
You can paint this or seal it with a sealer, but I'm just going to leave it like it is.
You can also use this method to cast paper - I used some sea shells and cookie presses - the possibilities are endless.


When the paper is dry it just peels off - be gentle.
 Have Fun!!

Romero Britto Pond Life or Frog Watercolor Art Project

  My 2nd grade students are studying Pond Life and Romero Britto is so much fun I thought they would enjoy making a bright and colorful frog...