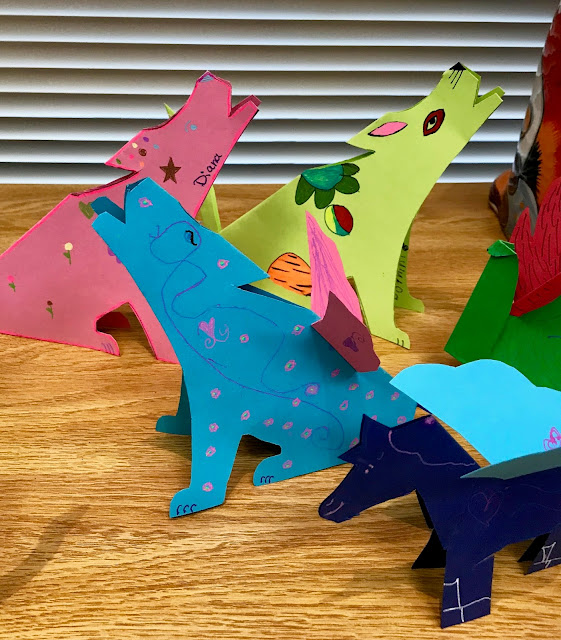
Ever since I saw the Disney Pixar Movie Coco I have been wanting to do some kind of art lesson on Alebrijes. I have always loved these imaginative animals with their bright bold colors and patterns, but the movie really inspired me to come up with a fun lesson for kids to make their own.
Alebrije are usually carved out of wood or made out of paper mâché. I thought about trying clay or paper mâché, but in the end decided this was too time consuming and I didn't want to do a drawing or painting - I wanted some dimension so this is what I came up with.
Pedro Linares - Artist who invented Alebrije - this link tells his story.
He made creatures that were made of different animals combined. I am going to tell his story and let my students decide if they want to change their animals paws to claws, give them wings, horns etc...
They can make a more realistic animal or be inspired to create their own unique Alebrije.
What you will need:
Colored cardstock
Glue
Gel pens
Pencils
Scissors
Glitter is optional
I found a pattern for a horse on Krokotac and changed it a little bit:
You can print this Jpeg directly onto card stock or trace it on the fold - see below.
I traced mine on a half sheet of card stock folded lengthwise. I am going to have my students trace theirs and add their own details such as eyes, mane, mouth etc... I think they will be able to do this on their own.
You may have to help them with the folding to make the head pop up.
Fold the neck towards the body.
Next fold the two angled folds on each side.
Push the neck towards the back fold and then fold the horse in half.
Put a little bit of glue inside the head and the tail, but not the body so it will stand.
Now it's ready for decorating. I used gel pens.
I'm going to show my students examples - if they want to make a donkey we can add bigger ears. They can make any animal with hooves with this, zebra, cow, deer, goat, sheep, etc... I used a bamboo skewer with glue and glitter to make the unicorn horn for mine and just put it inside the head with a little glue.
For the Coyote I made my own pattern which needs to be cut on a diagonal fold.
Once you get the Coyote cut out and glue on the tail it will keep him together so you don't need to glue anywhere else.
I would wait until you have all the decoration on both pieces before glueing.
By changing the ears and the tail you can make this into a cat, wolf, jaguar, leopard, raccoon, etc...
I made some wings to add to mine like this:
I cut them on a fold.
Then I folded one side about 1/8 of an inch
Turned it over and folded the other side to match
Now it's ready to decorate and will glue onto the animal's back
I can't wait to see what my students come up with! I'll post some pix after I teach it!
Photos of student work ages 5-12


Здорово! Спасибо за шаблоны:))
ReplyDeleteYou're welcome!
DeleteThank you for this great post about Senor Linares and his art. The asaptation of the crafts is great, too!
ReplyDeleteThis is really awesome and very inspiring!! I am an art volunteer and can't wait to try this with the kids in school.
ReplyDeleteThis comment has been removed by the author.
ReplyDelete